A skeg is a useful addition to a kayak that lacks one or whose existing skeg needs replacing. This guide covers what a skeg does, how it differs from a rudder, three recommended options, and how to install one yourself.
What is a Skeg?
A skeg is a retractable, fin-like blade on a kayak which is located under the stern. It is used to improve tracking (straight-line paddling) and prevent your kayak from turning into the wind. Unlike a rudder, a skeg doesn’t turn, but only moves up and down to adjust the boat’s stability in windy or current-heavy conditions.
What is the Purpose of a Skeg?
A skeg helps to anchor the stern (the rear end) of your vessel which makes it easier to control the heading of the kayak and keeps it moving straight ahead. This becomes very useful when you’re paddling on open waters or when strong winds are blowing.
Usually, skegs come with kayaks designed for touring or long excursions. This is because when winds are strong or when the kayak is cruising on open water bodies, kayaks can often come to sail against the wind. A skeg on a kayak can offset this effect by keeping your bow (the front end of your craft) facing the direction you’re heading.
This means if you mostly indulge in recreational kayaking, having a skeg attached to your kayak may not be necessary. And especially if the waters you paddle in frequently are shallow, rocky, or both – having a skeg is not recommended because these environments pose additional risks to your skeg. What this means is a skeg-loaded craft is not suitable for creek or whitewater paddling.
Are Rudders and Skegs the Same?
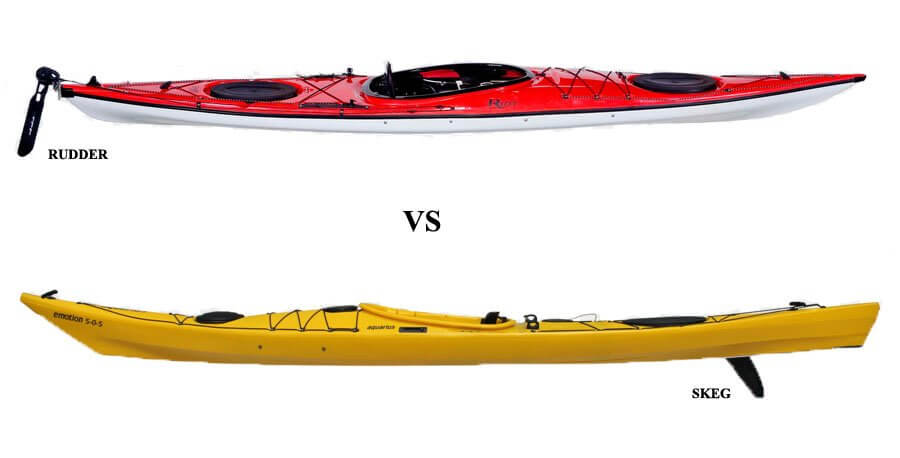
No – the differences lie in the design and the points they’re attached to a kayak. While both are located on the stern side of the craft, a rudder system is usually operated from the cockpit, through either hand or foot. The fin here is much more elongated and can be rotated – even moved vertically. Additionally, a rudder allows the user the flexibility to deploy or retract it according to need.
A skeg, in contrast, cannot be moved sideways – though it can be pulled up to the hull to different degrees when not it’s not needed. But that’s true only for adjustable kayaks. For fixed skeg designs, it can’t be moved at all.
Read: Skeg vs Rudder: Which Is Better for a Kayak?
3 Recommended Skegs For Kayaks
1. Aqua 9″ Surfboard Fin
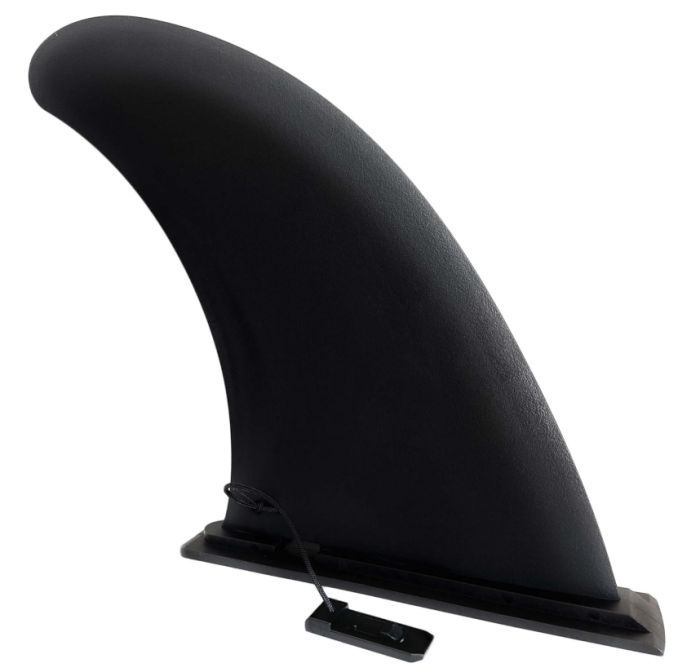
This skeg can be fitted on both kayaks and other small vessels. It’s 9inch (23cm) fin can be detached or adjusted and locked into the mount. This allows the user to remove the fin and still have the mounting in place when you don’t need it.
Another plus is you can mount it on your craft’s hull without the aid of tools – though it’s advised that you use a suitable (PVC compatible) marine glue for that purpose.
2. Surf & SUP Single Fin Detachable Center Fin
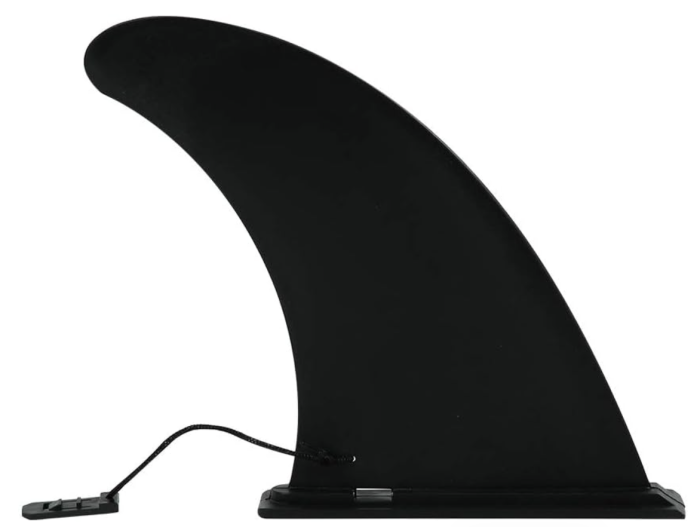
This kayak skeg can also be mounted to the keel of your craft using marine glue – so you don’t need fasteners like nuts or screws. It’s available in two sized (8.5 and 11.5 inches).
The mounting platform can also be attached using a PVC-safe marine glue.
3. Cressi Genuine iSUP Skegs
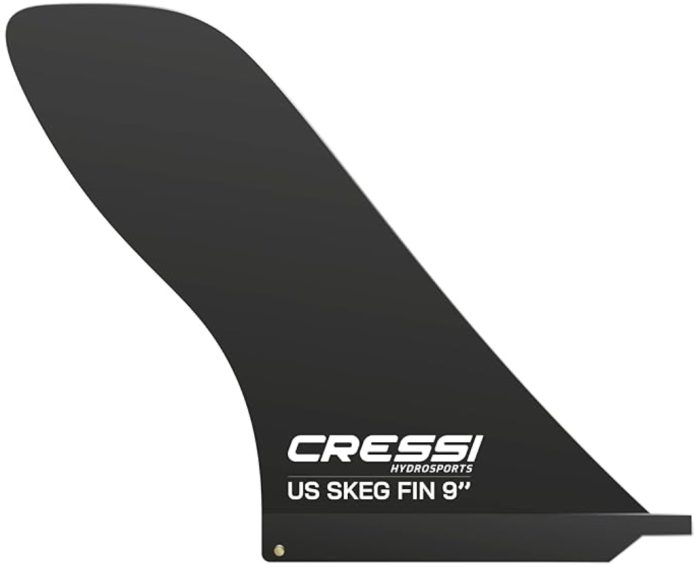
The 9inch Cressi Genuine iSUP Skeg is also ideal as a removable stabiliser as it doesn’t require any tools for installation – only marine glue.
How To Add A Skeg To A Kayak
This method should work with most kayaks, canoes and small boats.
You’ll Need:
- Marine glue
- Sandpaper
- A piece of cloth or a rag
- Hair dryer or heat torch (optional)
- Paddle leash (optional)
- Drill (optional)
Step 1 – Choose Mounting Location
Pinpoint your desired location. Turn your kayak upside down and mark the best place on the keel for the skeg. A general rule of thumb is to attach it to the centerline of the keel, on the stern side.
Step 2 – Sand Surface
Sand the area of attachment on the keel using sandpaper. Doing this will smoothen the surface and promote a better binding between the skeg and the surface.
Step 3 – Remove Dust
After sanding, use a rag or cloth to gently wipe off any dust residue.
Step 4 – (Optional) Heat Hull
In case your vessel is made of polyethylene, you might benefit from slightly heating the region of the keel that you’d like to mount the skeg on.
Step 5 – Apply Marine Adhesive
After preparing the target keel area, apply a marine glue and attach the mounting frame to the hull. Apply gentle hand pressure or use a weighted object to help the frame stick. Doing this should allow you to strengthen the bond between the hull and your skeg base.
Step 6 – Attach Fin (if necessary)
After the glue has dried, slide or attach the fin to the newly attached base. If your mounting comes with fin pre-attached; you don’t need to worry about this step.
Step 7 – Attach Leash (optional)
In case you feel the need to take extra precautions to prevent your skeg from getting torn away from its mounting – or getting lost otherwise – you could drill a small hole in the back of the fin. This will allow you to attach a paddle leash so that your skeg won’t get lost (even if it splits from the base upon hitting rocks or riverbeds).
For inflatable kayaks, you can either use the above steps to secure a skeg to your kayak, or seek a skeg that doesn’t require gluing. These latter skegs have designated points of attachment and can be mounted using manufacturer-provided guidelines.
Final Thoughts
Adding a skeg to a kayak that lacks one is a straightforward DIY project that can significantly improve tracking in crosswinds and open water conditions. Marine adhesive provides a reliable bond on most hull materials, and the installation process takes less than an hour.
For more on kayak tracking and steering, read our guide on skeg vs rudder.