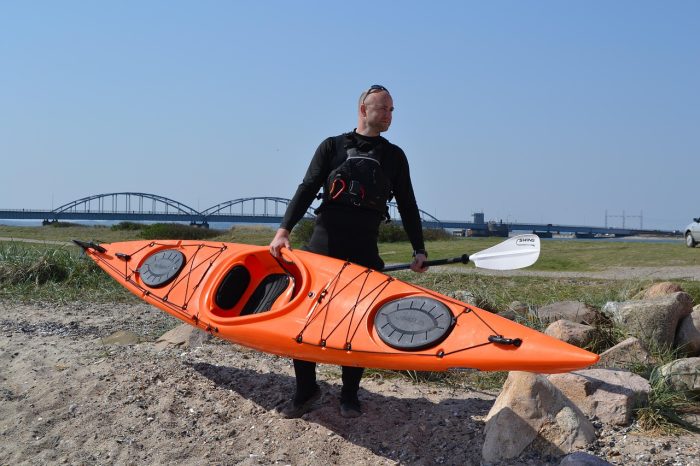
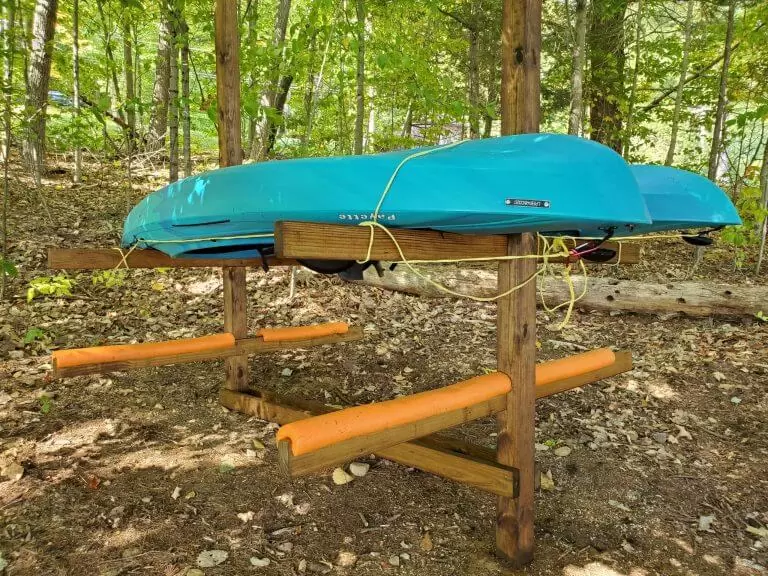
Building a wooden kayak rack is one of the most practical and affordable storage solutions for kayak owners. A well-built outdoor rack keeps your kayaks off the ground, protects the hull from deformation, and can be built in a weekend with basic tools and materials.
These instructions are for a four-kayak rack that holds up to five kayaks. The design uses two ground-mounted support posts with horizontal arms slotted into notches for maximum strength. Adjust the number of arms and spacing as needed for your specific kayaks.
What you need:
- Two 100mm x 100mm (4 x 4 inch) pressure-treated timber posts, 2.4m (8ft) long
- Several 45mm x 90mm (2 x 4 inch) pressure-treated boards for the support arms and cross braces
- Pressure-treated wood screws (75mm and 100mm)
- Post hole digger or spade
- Circular saw
- Chisel and mallet
- Sandpaper
- Exterior wood stain or sealant
- Spirit level
- Tape measure and pencil
Recommended timber: Pine, cedar, or redwood are the best choices for an outdoor rack as they resist rot and weather well. Pressure-treated timber is essential for any sections that contact the ground.
Time required: 1 to 3 days depending on your experience level and the tools available.
Step 1: Choose and Mark Your Site
Choose a flat, well-drained area for the rack. Avoid low-lying spots where water pools after rain as this accelerates timber rot at the base of the posts.
Mark the positions of the two support posts on the ground. The spacing between the posts determines how many kayaks the rack can hold and where the cockpit areas will sit. Measure your kayaks before marking to make sure the posts are far enough apart to support the hull without obstructing any storage hatches or cockpit rims.
A spacing of 1.5m (5ft) between posts works well for most standard recreational kayaks.
Step 2: Dig the Post Holes and Set the Posts
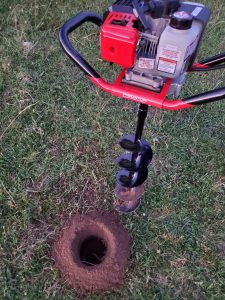
Dig a hole at each marked position using a post hole digger or spade. For a rack holding up to five kayaks, dig to a depth of at least 600mm (24 inches). Deeper holes provide greater stability, particularly in loose or sandy soil.
Add a layer of small stones or gravel at the bottom of each hole to improve drainage and keep the base of the post off wet soil. This significantly extends the life of the timber.
Place each post in its hole and check it is vertical using a spirit level. Backfill with the excavated soil, tamping it down firmly in layers as you go. For permanent installations, setting the posts in concrete provides the most stable result.
Step 3: Align the Posts
Once both posts are set, check that their faces are perfectly aligned with each other. This is important for the support arms to sit level across both posts.
Temporarily attach two 45mm x 90mm (2 x 4 inch) boards across the bottom of both posts, one on each side, running parallel from one post to the other. These temporary braces hold the posts in alignment while the concrete or backfill sets. Use a tape measure to confirm the spacing is consistent at the top and bottom of the posts before fixing the braces in place.
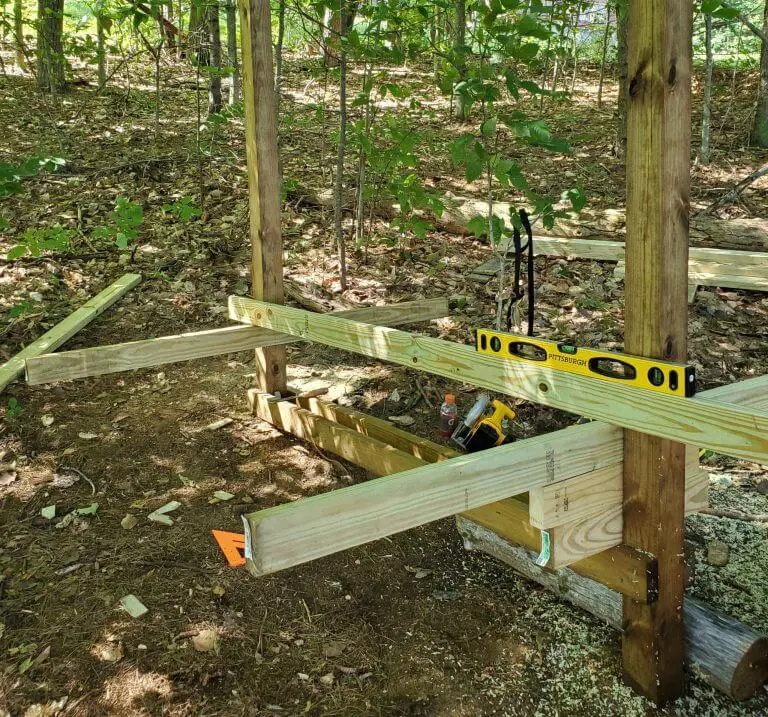
Step 4: Mark the Notch Positions

Mark the positions for the notches on each post where the support arms will be inserted. The notches are cut into the face of each post and the arm slots into them, which is significantly stronger than simply screwing the arms to the post face.
Space the notches evenly up the post to suit the number of kayaks you plan to store. Allow at least 300mm (12 inches) between each arm to provide clearance between stacked kayaks. Mark both posts at exactly the same heights so the arms will be level across the full width of the rack.
Step 5: Cut the Notches
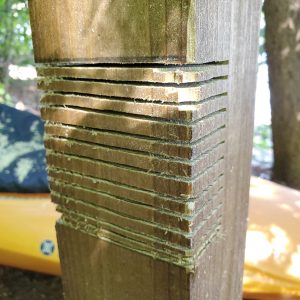
Set the cutting depth on your circular saw to match the thickness of the support arm boards. Make a cut along the top marked line of each notch and another along the bottom line.
Between the two outer cuts, make a series of additional parallel cuts spaced about 10mm apart. These additional cuts weaken the timber between the outer cuts and make the next step easier.
Take your time with the cuts and check the depth is consistent throughout. These notches carry the weight of the kayaks so accuracy matters.
Step 6: Remove the Waste Timber
Using a mallet, tap downward on the timber between the cuts. The sections will snap and break away, leaving a rough notch. Work carefully to avoid splitting below the bottom cut line.
Once the bulk of the waste timber is removed, use a sharp chisel to clean up the notch walls and floor. The goal is a flat, square notch that the support arm fits into snugly with no gaps.
Step 7: Refine the Notches
Work through the notch with a sharp chisel to remove any uneven ridges or rough spots left by the saw. A clean, flat notch ensures the support arm sits flush against the post and distributes the load evenly.
Finish the notch with sandpaper for a smooth surface. Test the fit by sliding a piece of the support arm timber into the notch — it should fit firmly without forcing.
Step 8: Attach the Support Arms
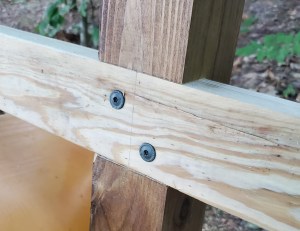
Cut the support arms to your desired length. A length of 600mm to 900mm (24 to 36 inches) provides good support for most kayak hulls without the arms becoming unwieldy.
Slot each arm into its notch and fix it in place with two or three 100mm (4 inch) pressure-treated wood screws driven through the arm and into the post. SPAX Wood Screws are a reliable choice for outdoor timber construction. The notch carries the weight of the kayak — the screws prevent the arms from pulling out of the notches rather than bearing the load directly.
Add foam pipe insulation, pool noodles, or carpet to the top surface of each arm to protect the kayak hull from scratches and pressure points.
If you prefer a ready-made wall storage solution rather than building from scratch, the RAD Sportz Kayak Wall Hangers are a practical and affordable alternative.
Step 9 – Apply Protective Finish
Sand any rough edges on the completed rack and apply two coats of exterior wood stain or sealant to all exposed timber surfaces. This protects the wood from UV damage, rain, and moisture and significantly extends the life of the rack.
Pay particular attention to the end grain of cut timber, which absorbs moisture readily. Apply an extra coat to end grain sections.
Allow the stain to dry fully before loading kayaks onto the rack.
Final Thoughts
A well-built wooden kayak rack is a practical long-term storage solution that can hold multiple kayaks securely for years. The notched arm design is significantly stronger than surface-mounted brackets and distributes the weight of the kayaks across the full post rather than relying on screws alone.
For more on kayak storage options, read our guides on how to store a kayak and do you need a kayak rack.